Users and Skills - User Guide
In this guide, you will learn everything about the Users screen and the Skills screen in SGI. This is where you manage the team, invite new users, set permissions, and organize employee competencies.
1. Accessing the Users screen
On the left sidebar menu, click "Usuarios" (Users). You will be taken to the page with all registered users in the system.
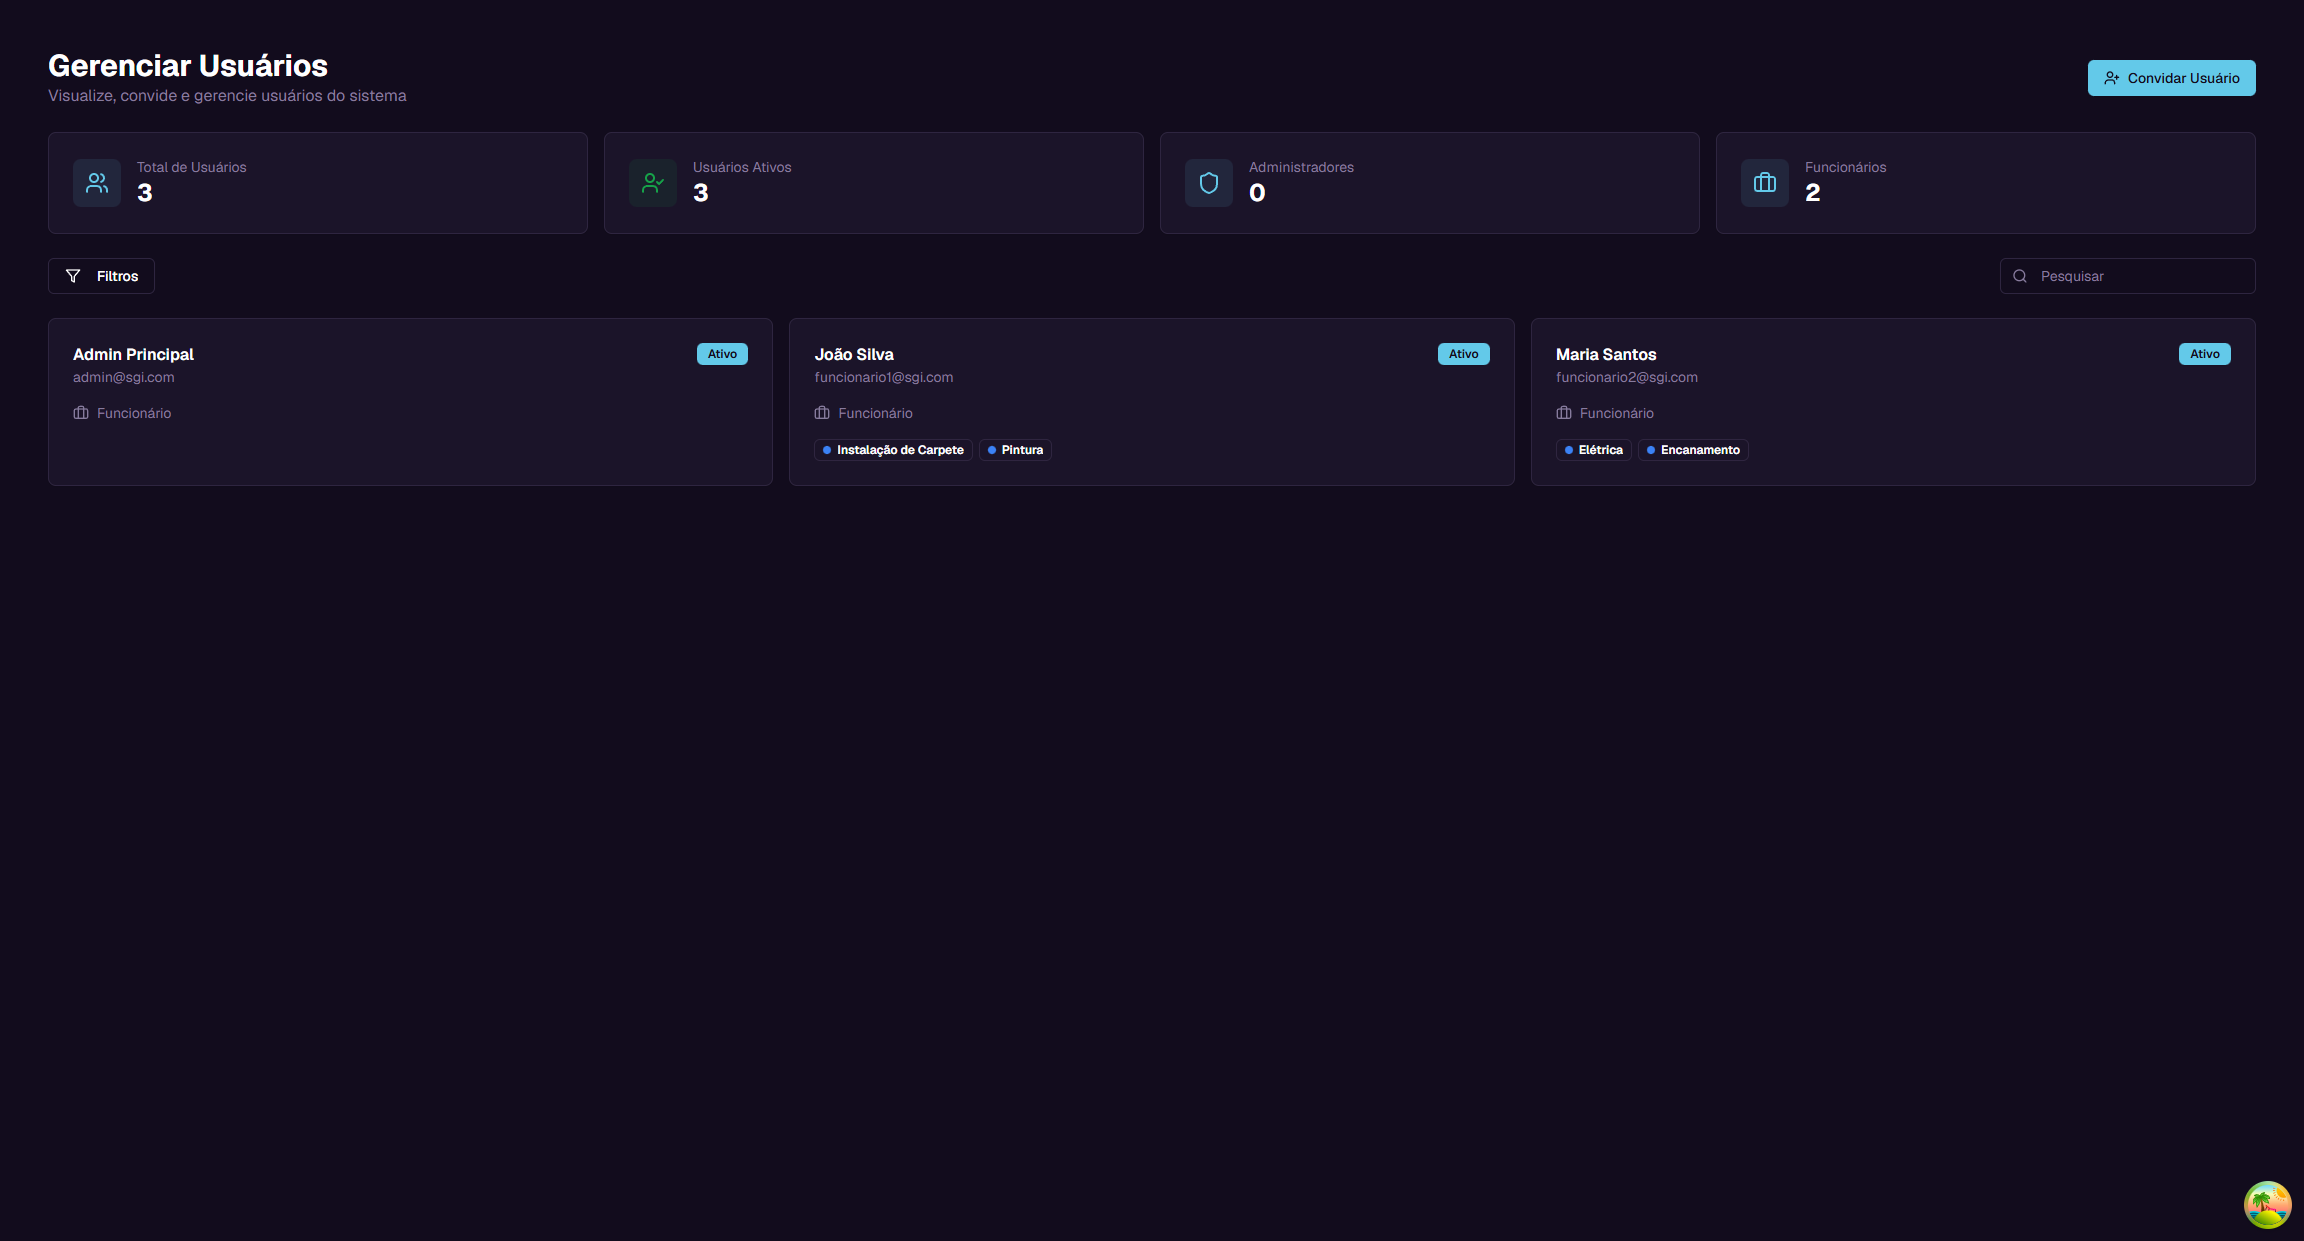
2. Understanding the main screen
Summary cards
At the top of the page, there are 4 cards with general information:
| Card | What it shows | Example |
|---|---|---|
| Total de Usuarios (Total Users) | How many users are registered | 3 |
| Usuarios Ativos (Active Users) | How many users have active accounts | 3 |
| Administradores (Administrators) | How many users have Admin role | 0 |
| Funcionarios (Employees) | How many users have Employee role | 2 |
Search field
Below the cards, there is a search field with the text "Pesquisar" (Search). Type a user's name or email to filter the list.
Each user card
Each user appears as a card with the following information:
- Name - User's full name (e.g., "Joao Silva")
- Email - User's email (e.g., funcionario1@sgi.com)
- Status - Green "Ativo" (Active) or red "Inativo" (Inactive) tag
- Role - Icon + text indicating the role (e.g., Funcionario/Employee)
- Skills - Colored badges showing the user's skills (e.g., Instalacao de Carpete, Pintura)
3. Role hierarchy
SGI has 3 access levels. Each role has different permissions in the system.
Super Administrator
The highest role. Has full control over the system: - Can invite users of any role (superadmin, admin, employee) - Can manage all users - All permissions are enabled
Administrator
Manages employees and projects: - Can only invite Employees - Can only manage Employees - Has all permissions except managing other admins
Employee
Basic system access: - Cannot invite anyone - Cannot manage other users - Granular permissions (individually configured by the administrator)
Comparison table
| Permission | Super Admin | Admin | Employee |
|---|---|---|---|
| Create projects | Yes | Yes | No |
| Edit projects | Yes | Yes | No |
| Delete projects | Yes | Yes | No |
| View all projects | Yes | Yes | No |
| Add costs | Yes | Yes | Yes |
| Approve costs | Yes | Yes | No |
Note: An employee's permissions can be individually adjusted by the administrator. For example, you can give a specific employee permission to create projects.
Who can invite whom
| Your role | Can invite |
|---|---|
| Super Administrator | Super Admin, Admin, and Employee |
| Administrator | Only Employee |
| Employee | No one |
4. Inviting a new user
To add a new team member, click the "Convidar Usuario" (Invite User) button in the upper right corner.
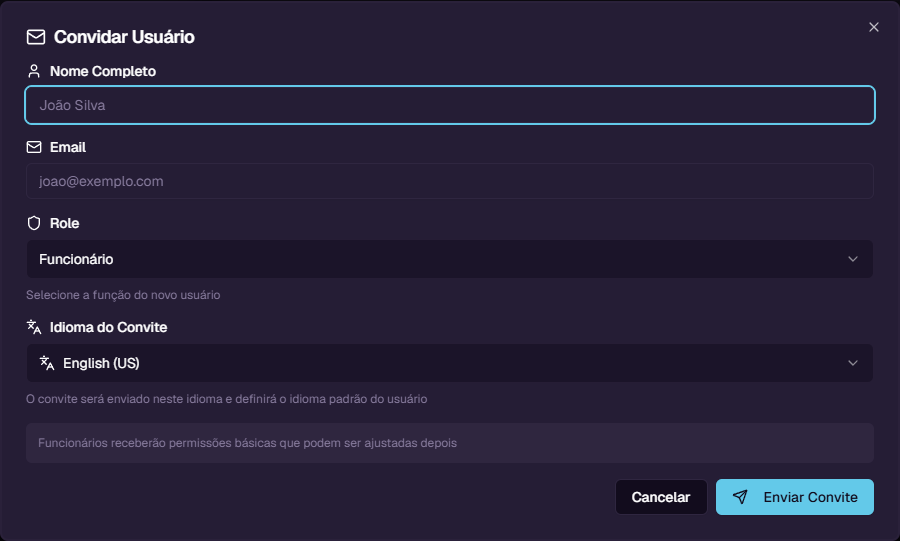
A window will open with the following fields:
| Field | Required? | Description |
|---|---|---|
| Nome Completo (Full Name) | Yes | The new user's full name |
| Yes | Email to send the invitation | |
| Role | Yes | User's role: Funcionario (Employee), Administrador (Administrator), or Super Administrador (Super Administrator) |
| Idioma do Convite (Invitation Language) | No | Language of the invitation email (English US or Portugues BR). Sets the system language on first access, but the employee can change it later in settings |
Step-by-step example
Let's invite a new employee:
- Click "Convidar Usuario"
- In Nome Completo, type:
Carlos Oliveira - In Email, type:
carlos@exemplo.com - In Role, select:
Funcionario - In Idioma do Convite, select:
Portugues (BR) - Click "Enviar Convite" (Send Invitation)
The system will send an email with the invitation link to the provided address.
Note: The invitation is valid for 7 days. After this period, the link expires and you will need to send a new invitation.
5. How the user accepts the invitation
After you send the invitation, the new user receives an email with a special link. The process is as follows:
- The user receives the email and clicks the link
- They are taken to a page showing the invitation details (name, email, role, who invited them)
- The user creates a password (minimum 6 characters)
- Clicks "Completar Cadastro" (Complete Registration)
Done! The account is automatically created with: - Default permissions for the selected role - Zeroed statistics (projects and costs) - "Active" status
6. User details
To view a user's details, click their card in the list. A side panel will open with complete information.
Header
At the top of the panel, you see: - Avatar - Circle with the name initial - Name - Full name - Email - User's email - Role - Badge indicating the role (e.g., Funcionario) - Status - Badge indicating Active or Inactive - "Editar" (Edit) button - Opens the edit form
Tab: Basico (Basic)
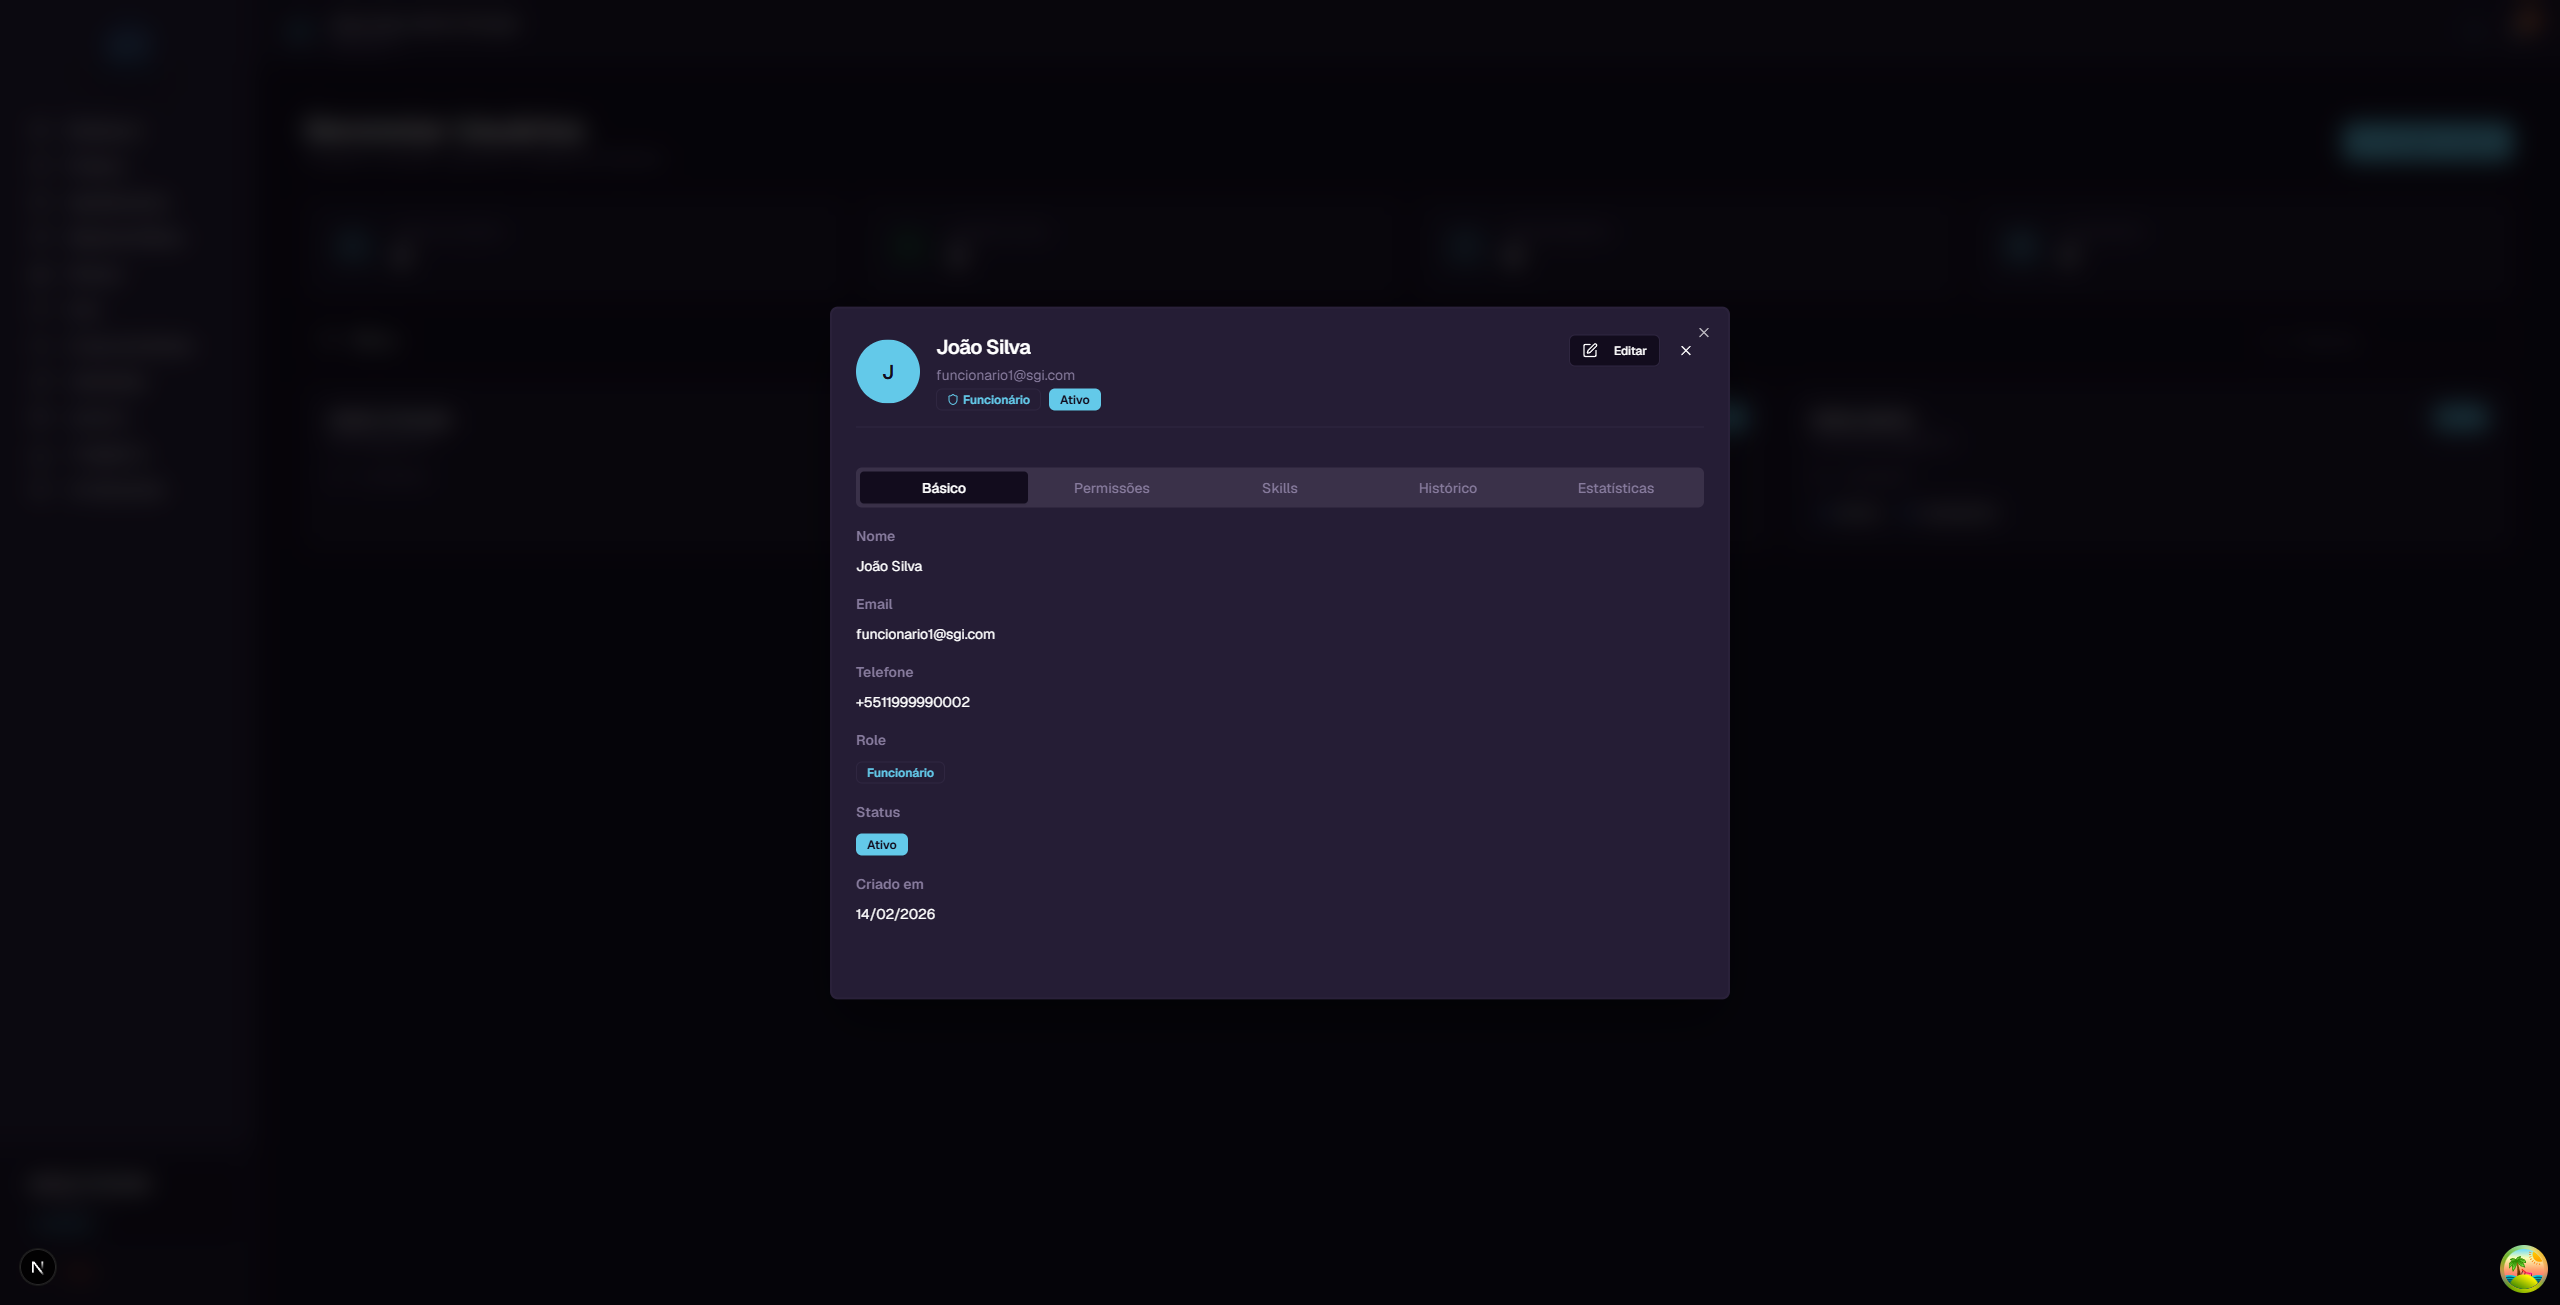
Shows the user's personal information: - Name - Email - Phone - Role (colored badge) - Status (colored badge) - Account creation date
Tab: Permissoes (Permissions)
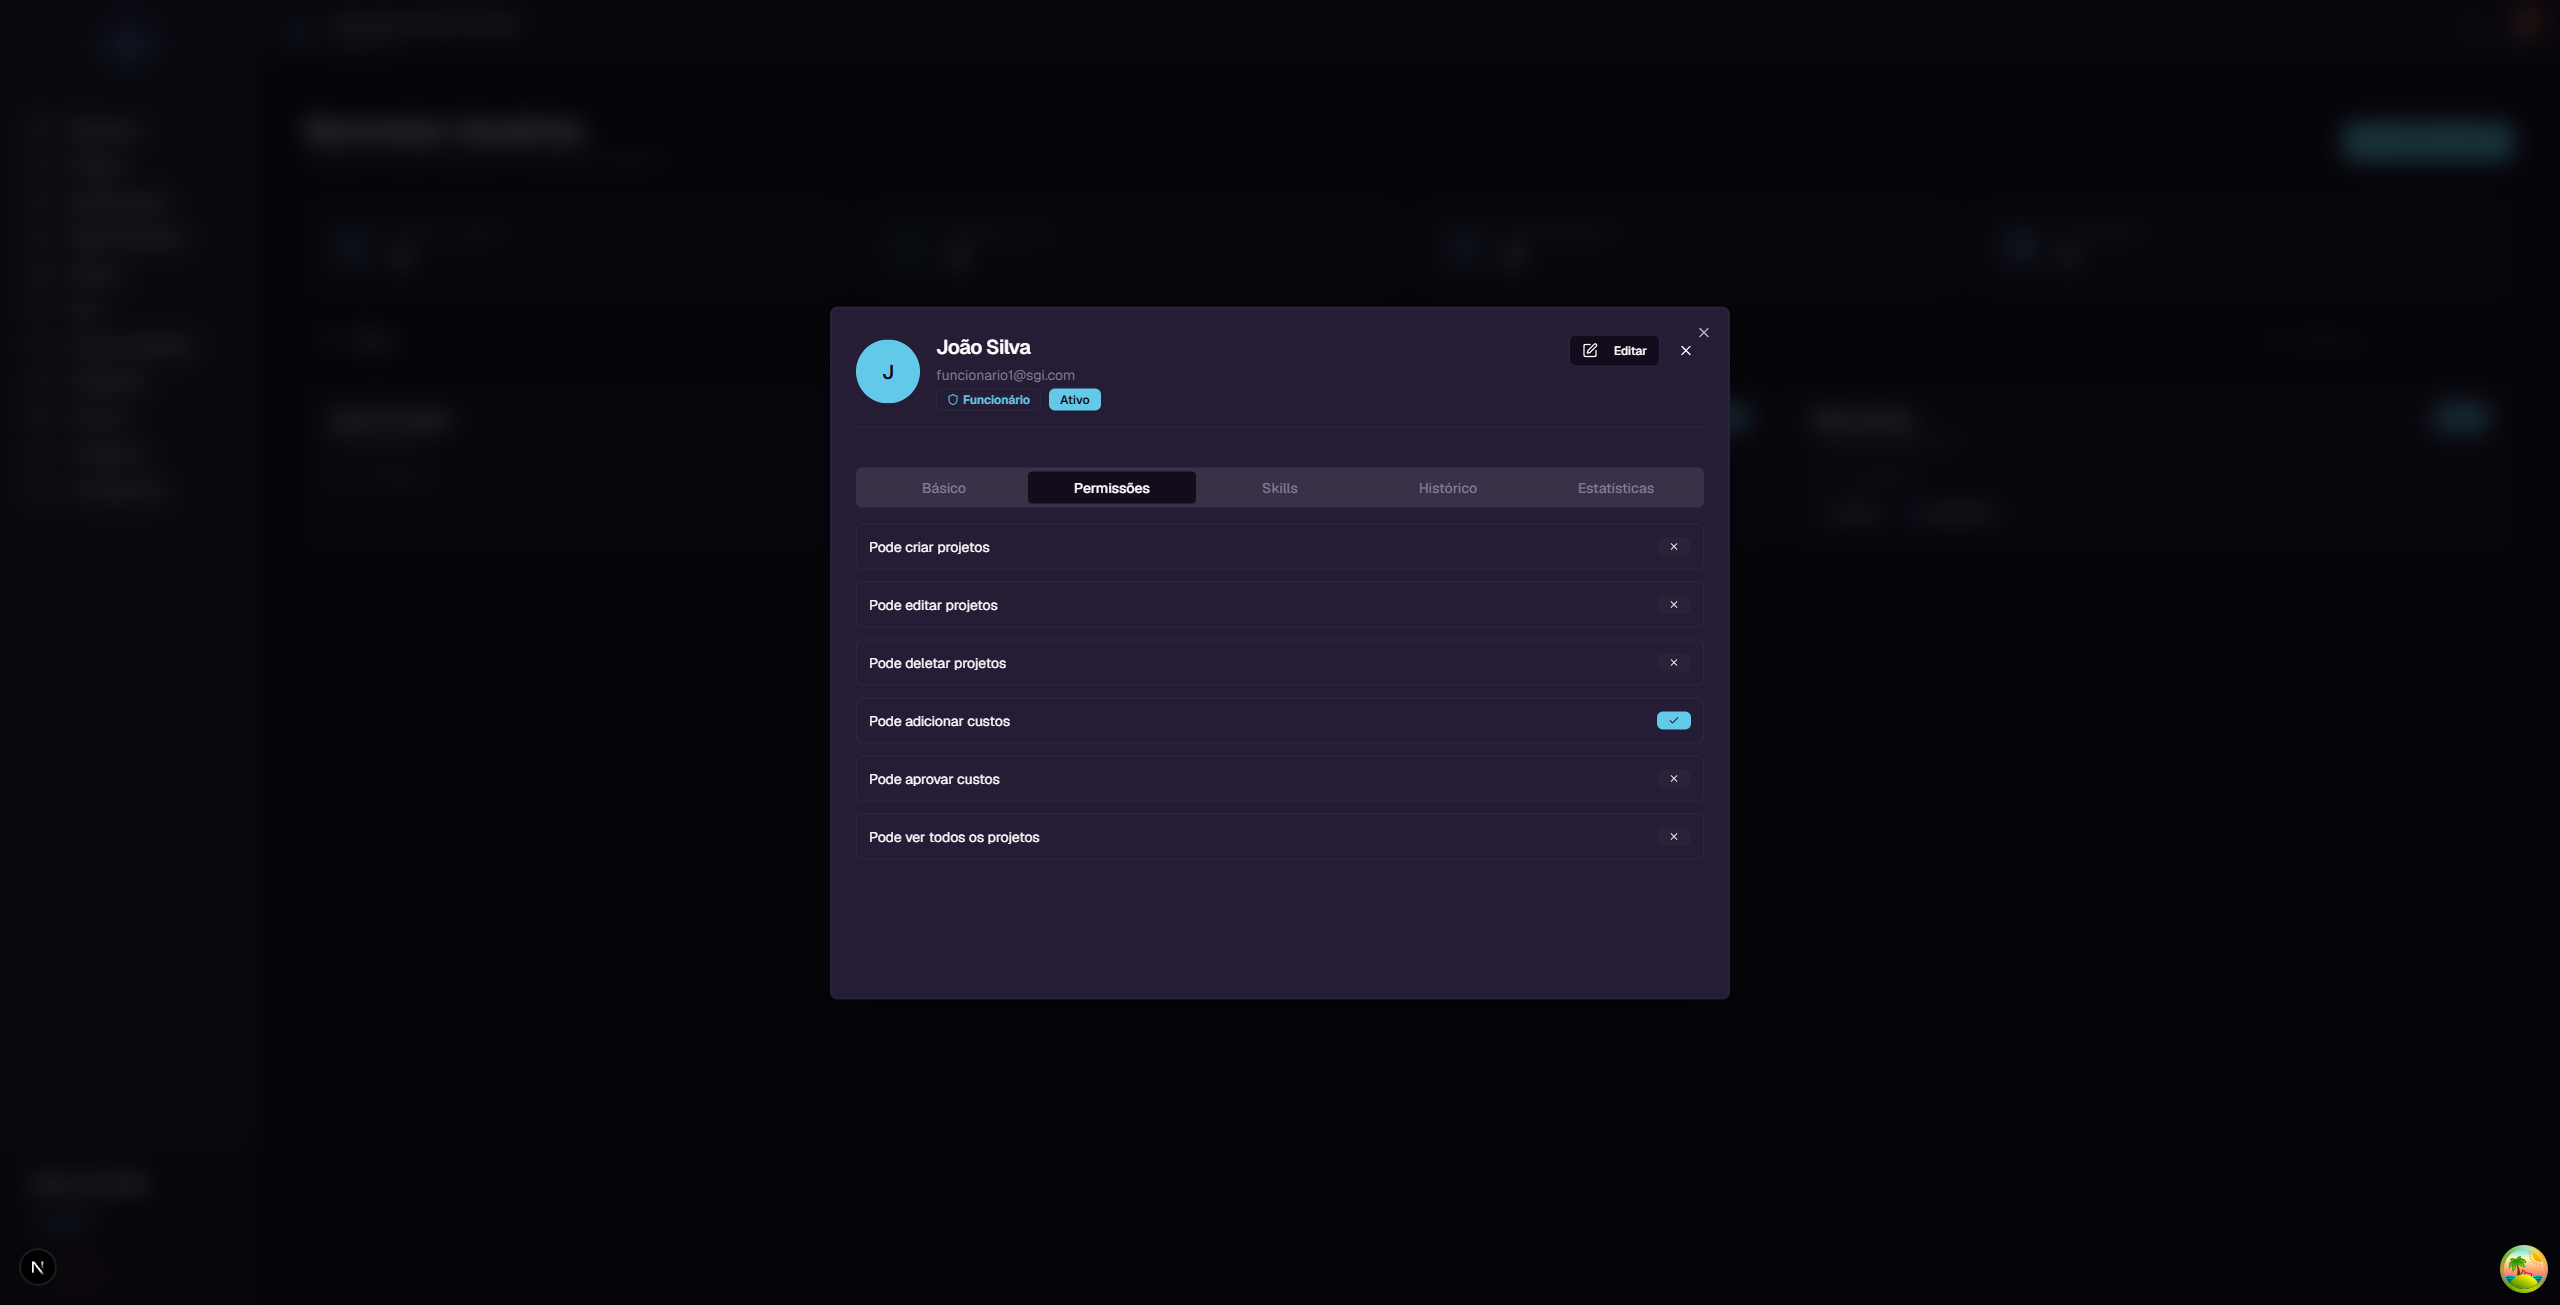
Shows the 6 user permissions with toggles (on/off):
| Permission | What it controls |
|---|---|
| Pode criar projetos (Can create projects) | Allows creating new projects in the system |
| Pode editar projetos (Can edit projects) | Allows changing data of existing projects |
| Pode deletar projetos (Can delete projects) | Allows deleting projects |
| Pode adicionar custos (Can add costs) | Allows recording costs in projects |
| Pode aprovar custos (Can approve costs) | Allows managing the status of recorded costs |
| Pode ver todos os projetos (Can view all projects) | Allows viewing all projects, not just assigned ones |
Tab: Skills
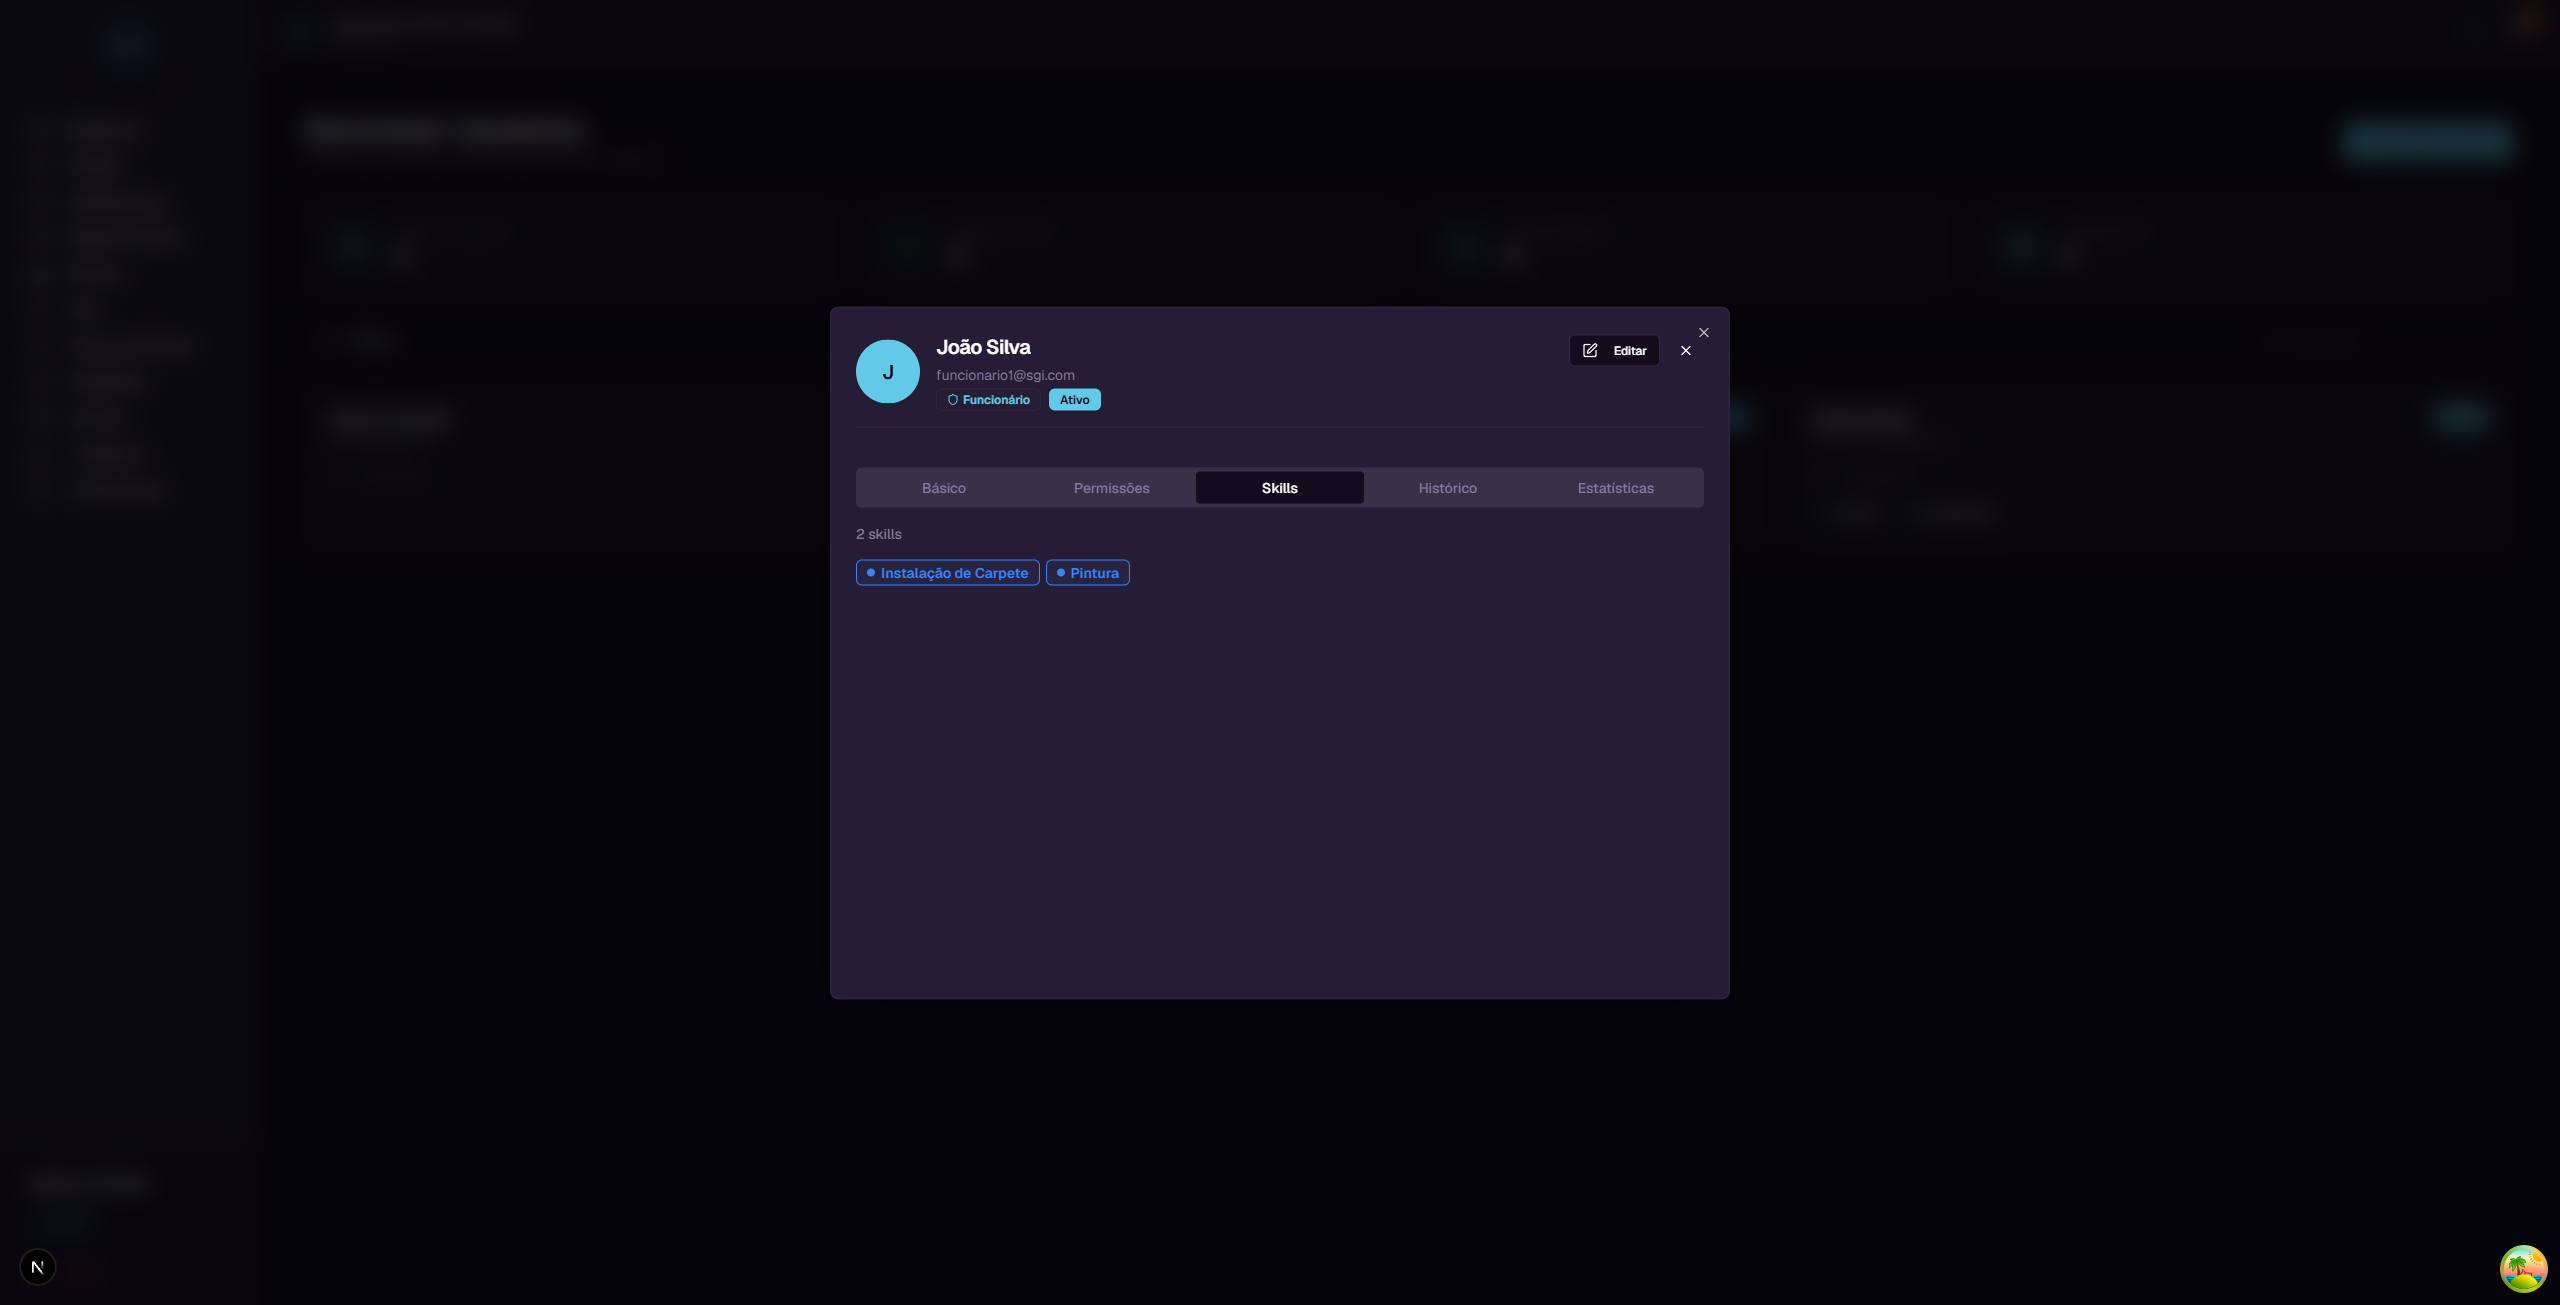
Shows the count and colored badges of skills assigned to the user.
Example: Joao Silva has 2 skills: "Instalacao de Carpete" (Carpet Installation) and "Pintura" (Painting).
Tab: Historico (History)
Shows a timeline with all user activities in the system (audit log). Each event shows the date, time, and what happened.
Tab: Estatisticas (Statistics)
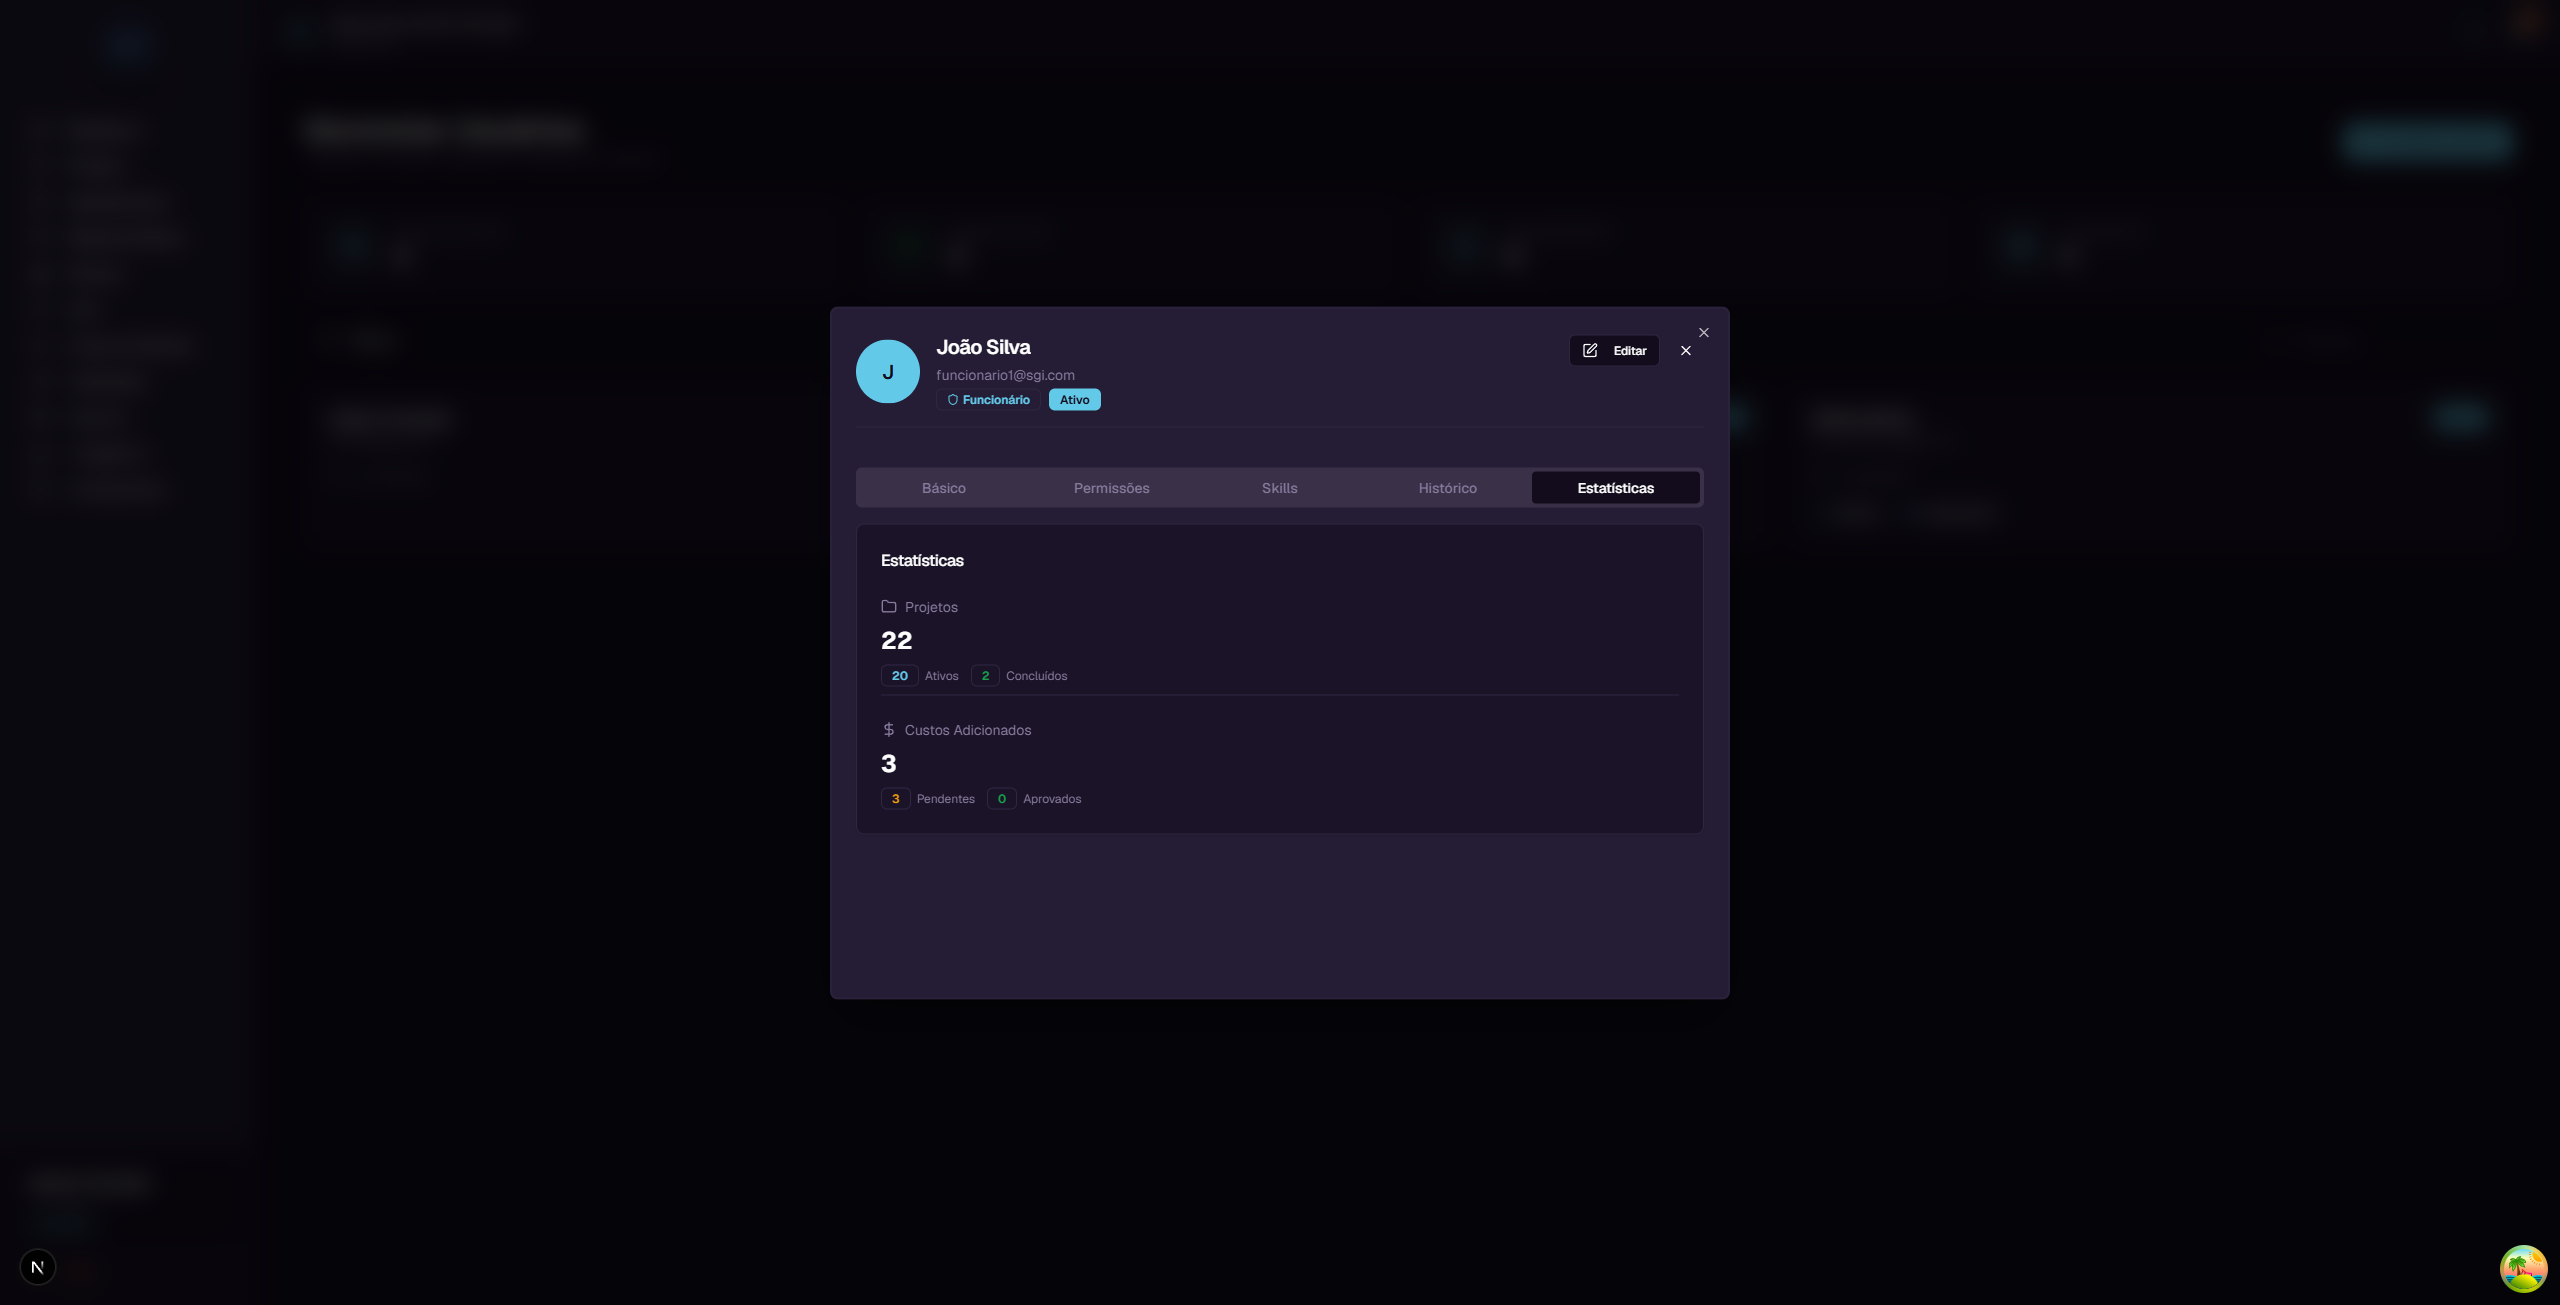
Shows numbers about the user's participation:
Projects: - Total - How many projects the user participates in (e.g., 22) - Ativos (Active) - How many are in progress (e.g., 20) - Concluidos (Completed) - How many have been finished (e.g., 2)
Costs Added: - Total - How many costs the user has recorded (e.g., 3) - Pendentes (Pending) - How many still await approval (e.g., 3) - Aprovados (Approved) - How many have been approved (e.g., 0)
7. Editing a user
To edit a user, click their card in the list and then click the "Editar" (Edit) button in the upper right corner of the panel.
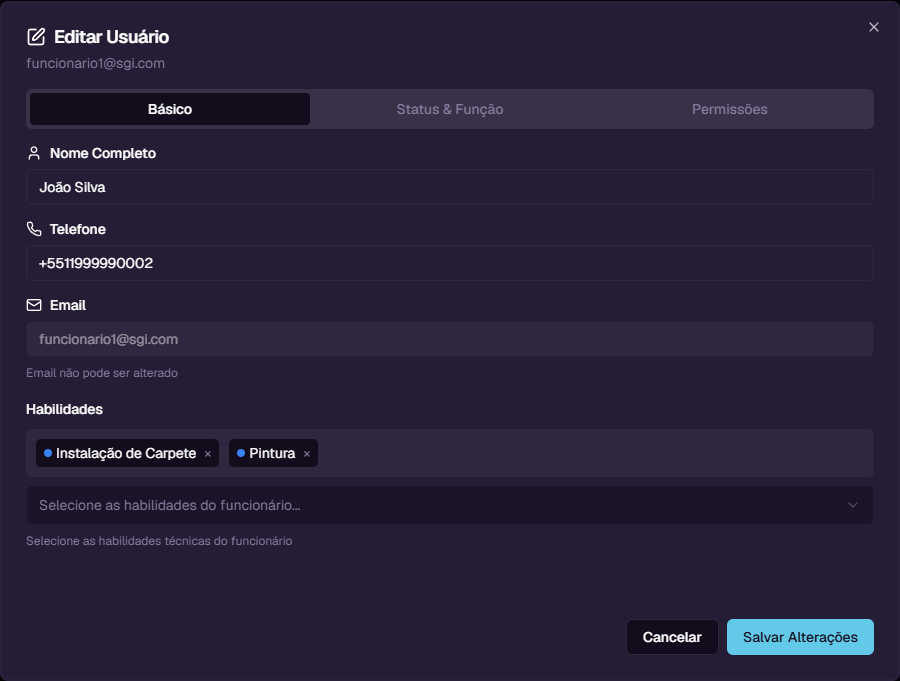
The edit dialog has 3 tabs:
Tab: Basico (Basic)
- Nome Completo (Full Name) - Change the user's name
- Telefone (Phone) - Change the phone number
- Email - Disabled field (email cannot be changed)
- Habilidades (Skills) - Select or remove user skills (multi-select with tags)
Tab: Status & Funcao (Status & Role)
- Status - Switch between Active and Inactive
- Funcao (Role) - Change the user's role
Deactivating a user: When you change the status to "Inactive", the user loses access to the system but their data is kept. You can reactivate at any time.
Tab: Permissoes (Permissions)
- Checkboxes for each of the 6 permissions
- Allows adjusting permissions individually, regardless of the default role
After making changes, click "Salvar Alteracoes" (Save Changes).
8. Filtering users
Click the "Filtros" (Filters) button to open the filters panel.
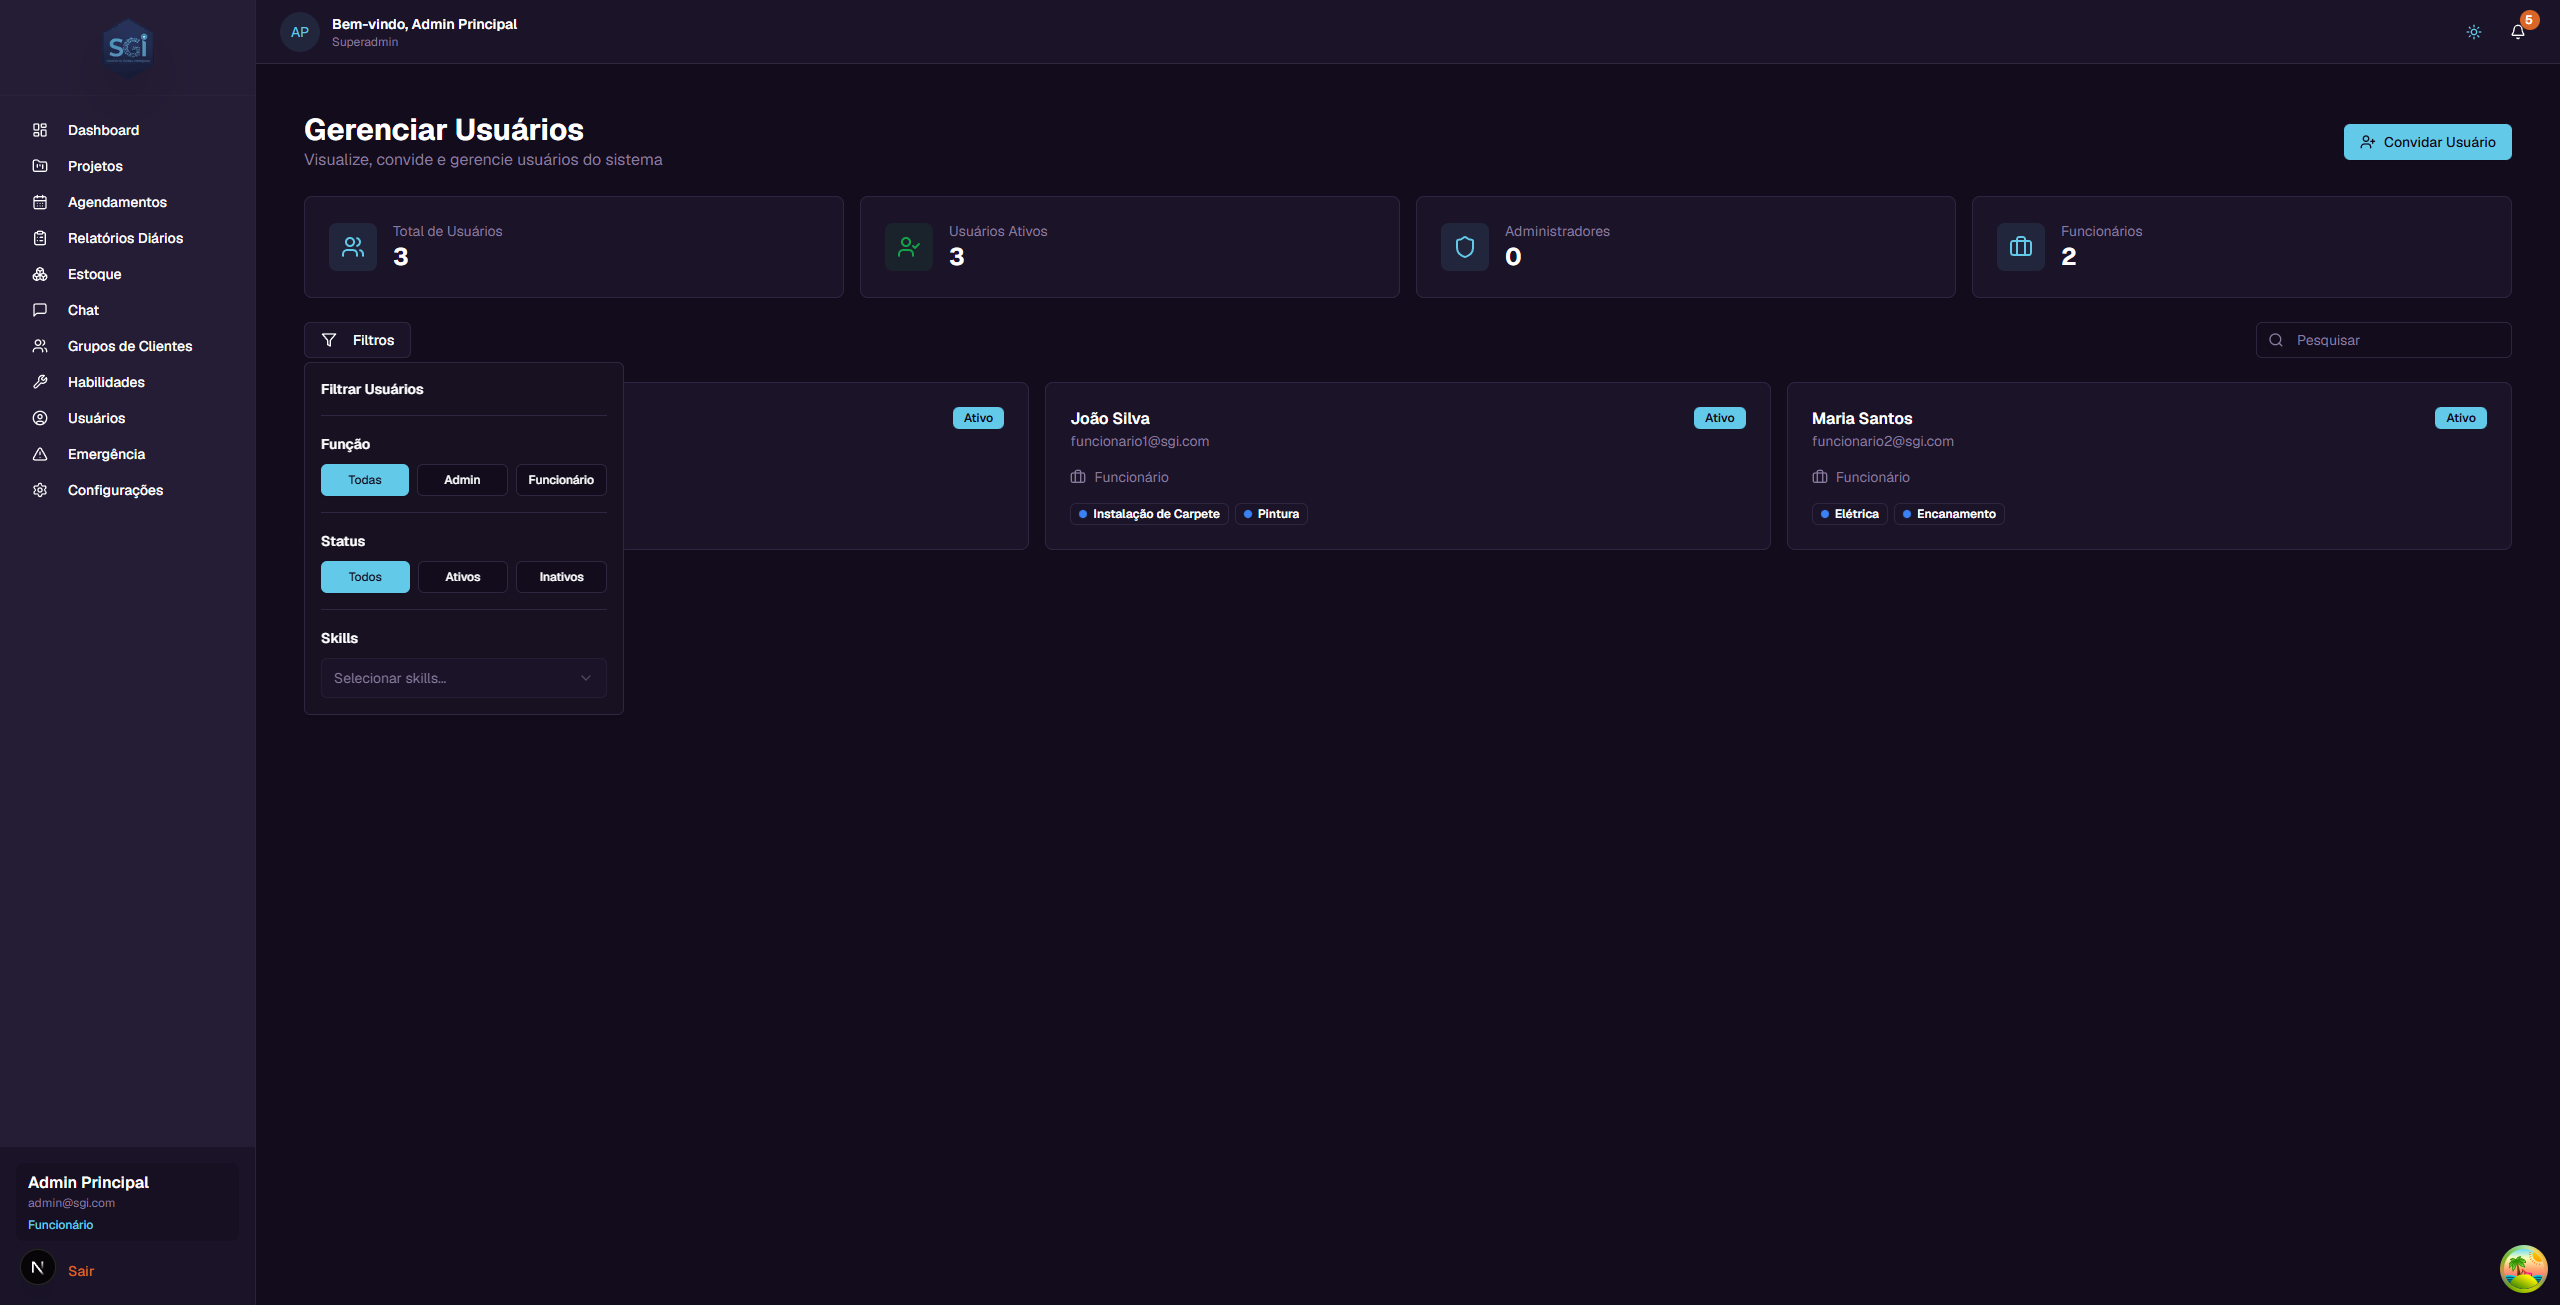
The available filters are:
Funcao (Role)
Filter by user role: - Todas (All) - Shows everyone (default) - Admin - Only administrators - Funcionario (Employee) - Only employees
Status
Filter by account state: - Todos (All) - Shows everyone (default) - Ativos (Active) - Only active accounts - Inativos (Inactive) - Only deactivated accounts
Skills
Filter by specific skill. Select one or more skills from the dropdown to see only users who have that competency.
9. Permissions in detail
What each permission controls
| Permission | What the user CAN do with it | What they CANNOT do without it |
|---|---|---|
| Create projects | Click "+ Novo Projeto" and create projects | Does not see the create project button |
| Edit projects | Change name, address, budget, team | Does not see the "Edit" button on projects |
| Delete projects | Permanently delete projects | Does not see the "Delete" button on projects |
| Add costs | Record expenses in projects | Cannot add costs (via app or chat) |
| Approve costs | Manage the status of costs recorded in projects | Cannot change the status of costs |
| View all projects | View all projects in the system | Only sees projects they are assigned to |
Default permissions by role
When a user is created, they receive the default permissions for their role:
- Super Admin and Admin: All 6 permissions enabled
- Employee: Granular permissions configured by the administrator
How to adjust an employee's permissions
You can give extra permissions to a specific employee:
- Click on the employee's card in the list
- Click "Editar" (Edit)
- Go to the "Permissoes" (Permissions) tab
- Check the desired permissions
- Click "Salvar Alteracoes" (Save Changes)
Example: To allow employee Joao Silva to create projects: 1. Open Joao Silva's panel 2. Click "Editar" > "Permissoes" tab 3. Check "Pode criar projetos" (Can create projects) 4. Save
10. Skills
Skills are competency tags that you assign to employees. They serve two main purposes:
- Organization: Quickly identify what each employee can do
- Artificial Intelligence: The Chat AI uses skills to suggest the right employee for each type of service. For example, when assembling a team for an electrical project, the AI suggests employees with the "Eletrica" (Electrical) skill
Accessing the Skills screen
On the left sidebar menu, click "Habilidades" (Skills). You will see the list of all registered skills.
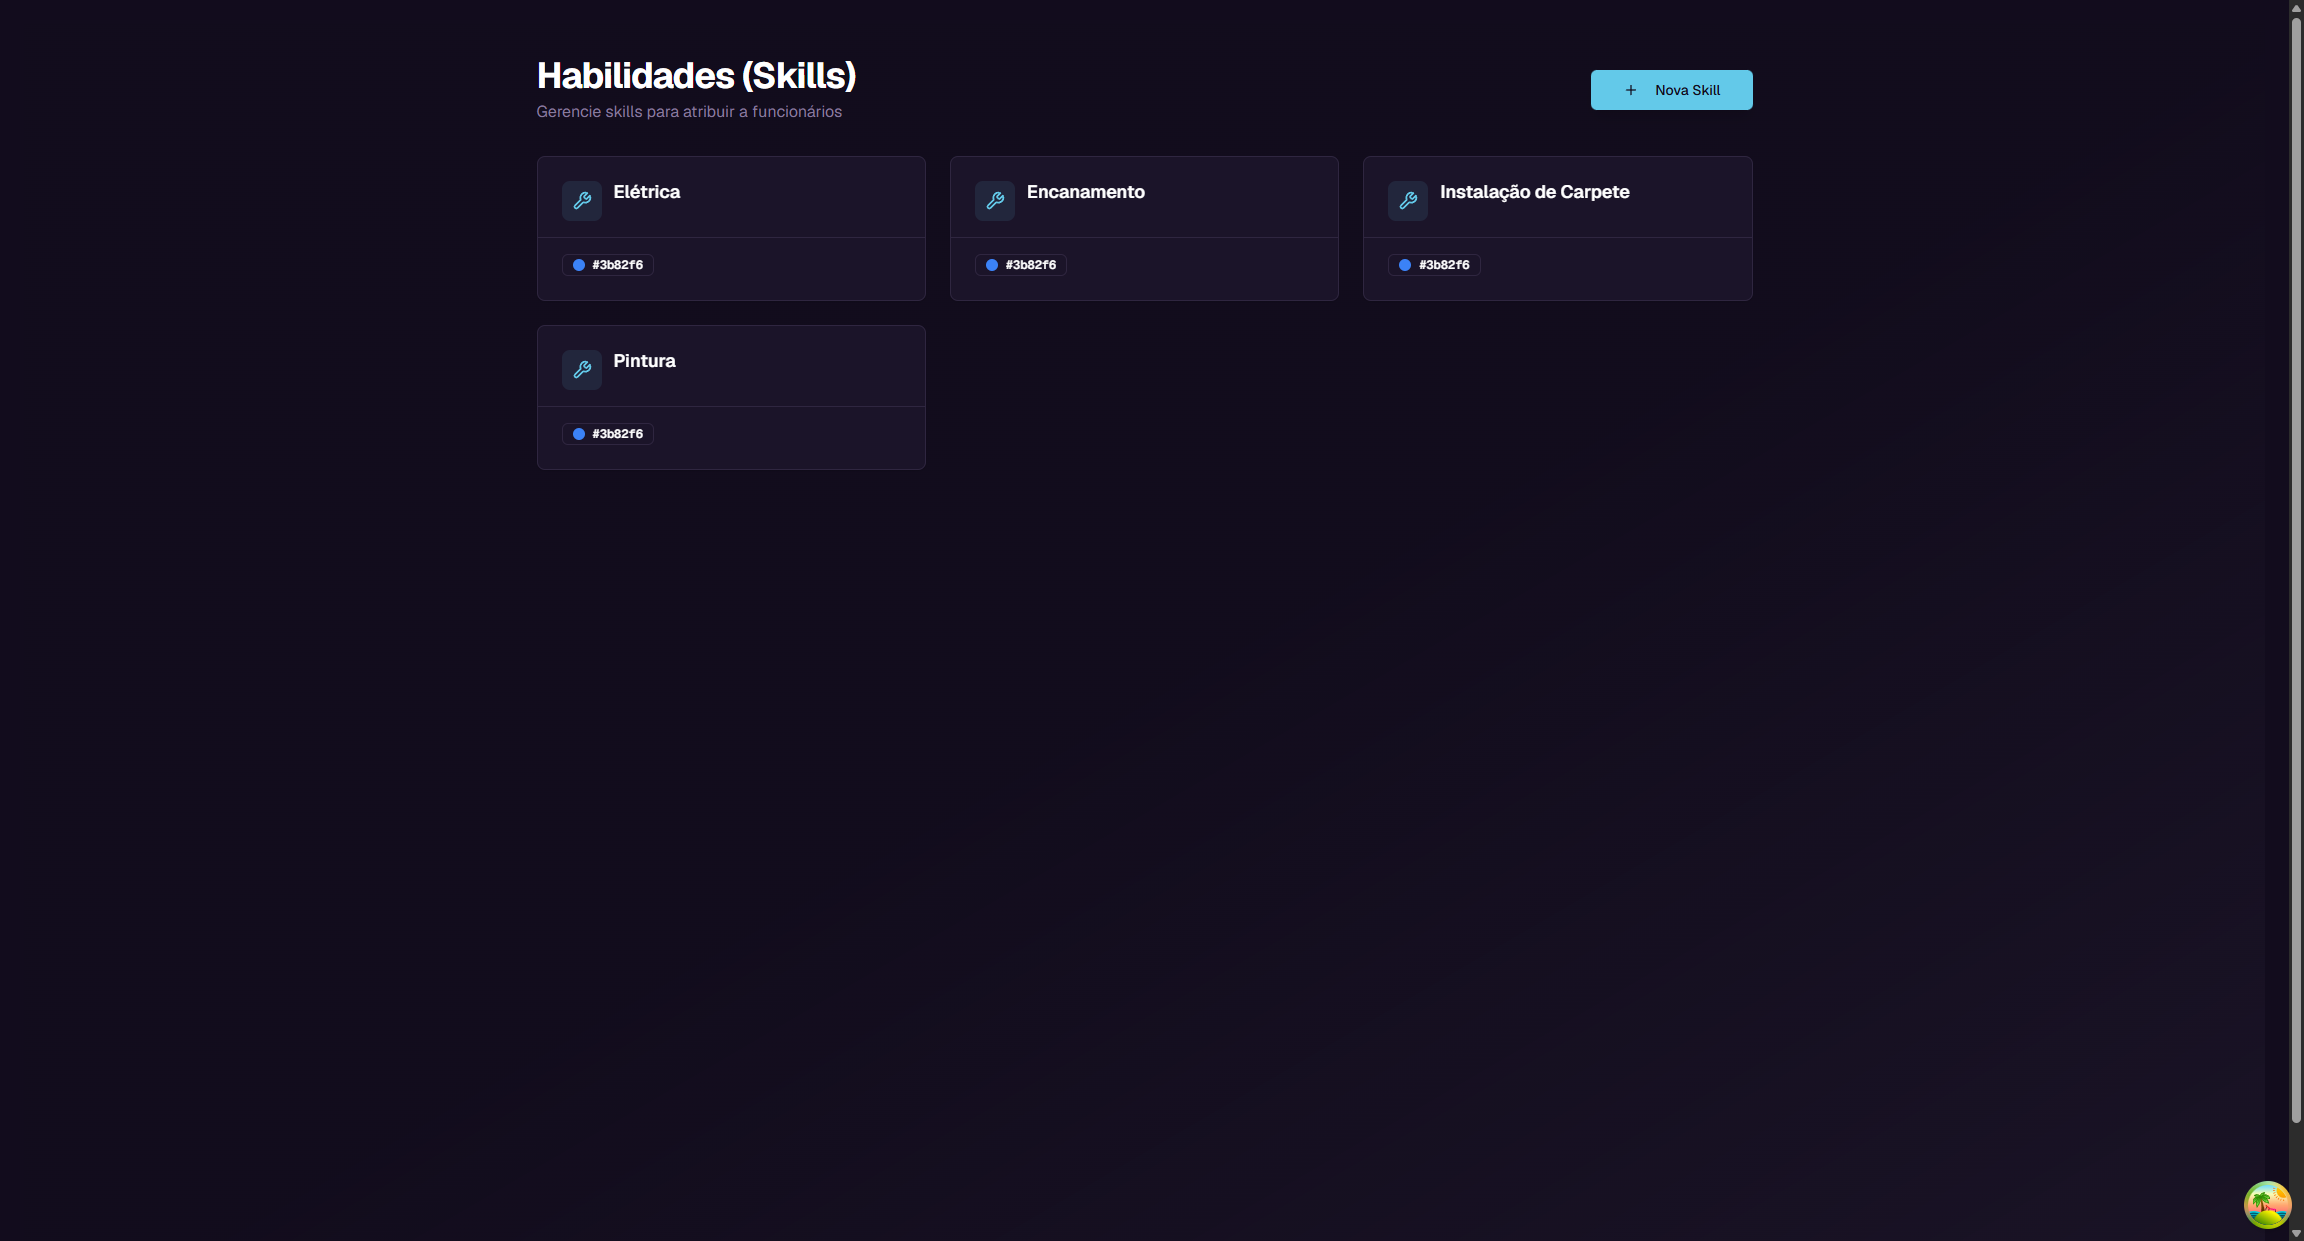
Each skill appears as a card with: - Icon - Tool icon - Name - Skill name (e.g., Eletrica, Pintura, Encanamento) - Color - Visual indicator of the assigned color - Buttons - Edit (pencil) and Delete (trash)
Creating a new skill
Click the "Nova Skill" (New Skill) button in the upper right corner.
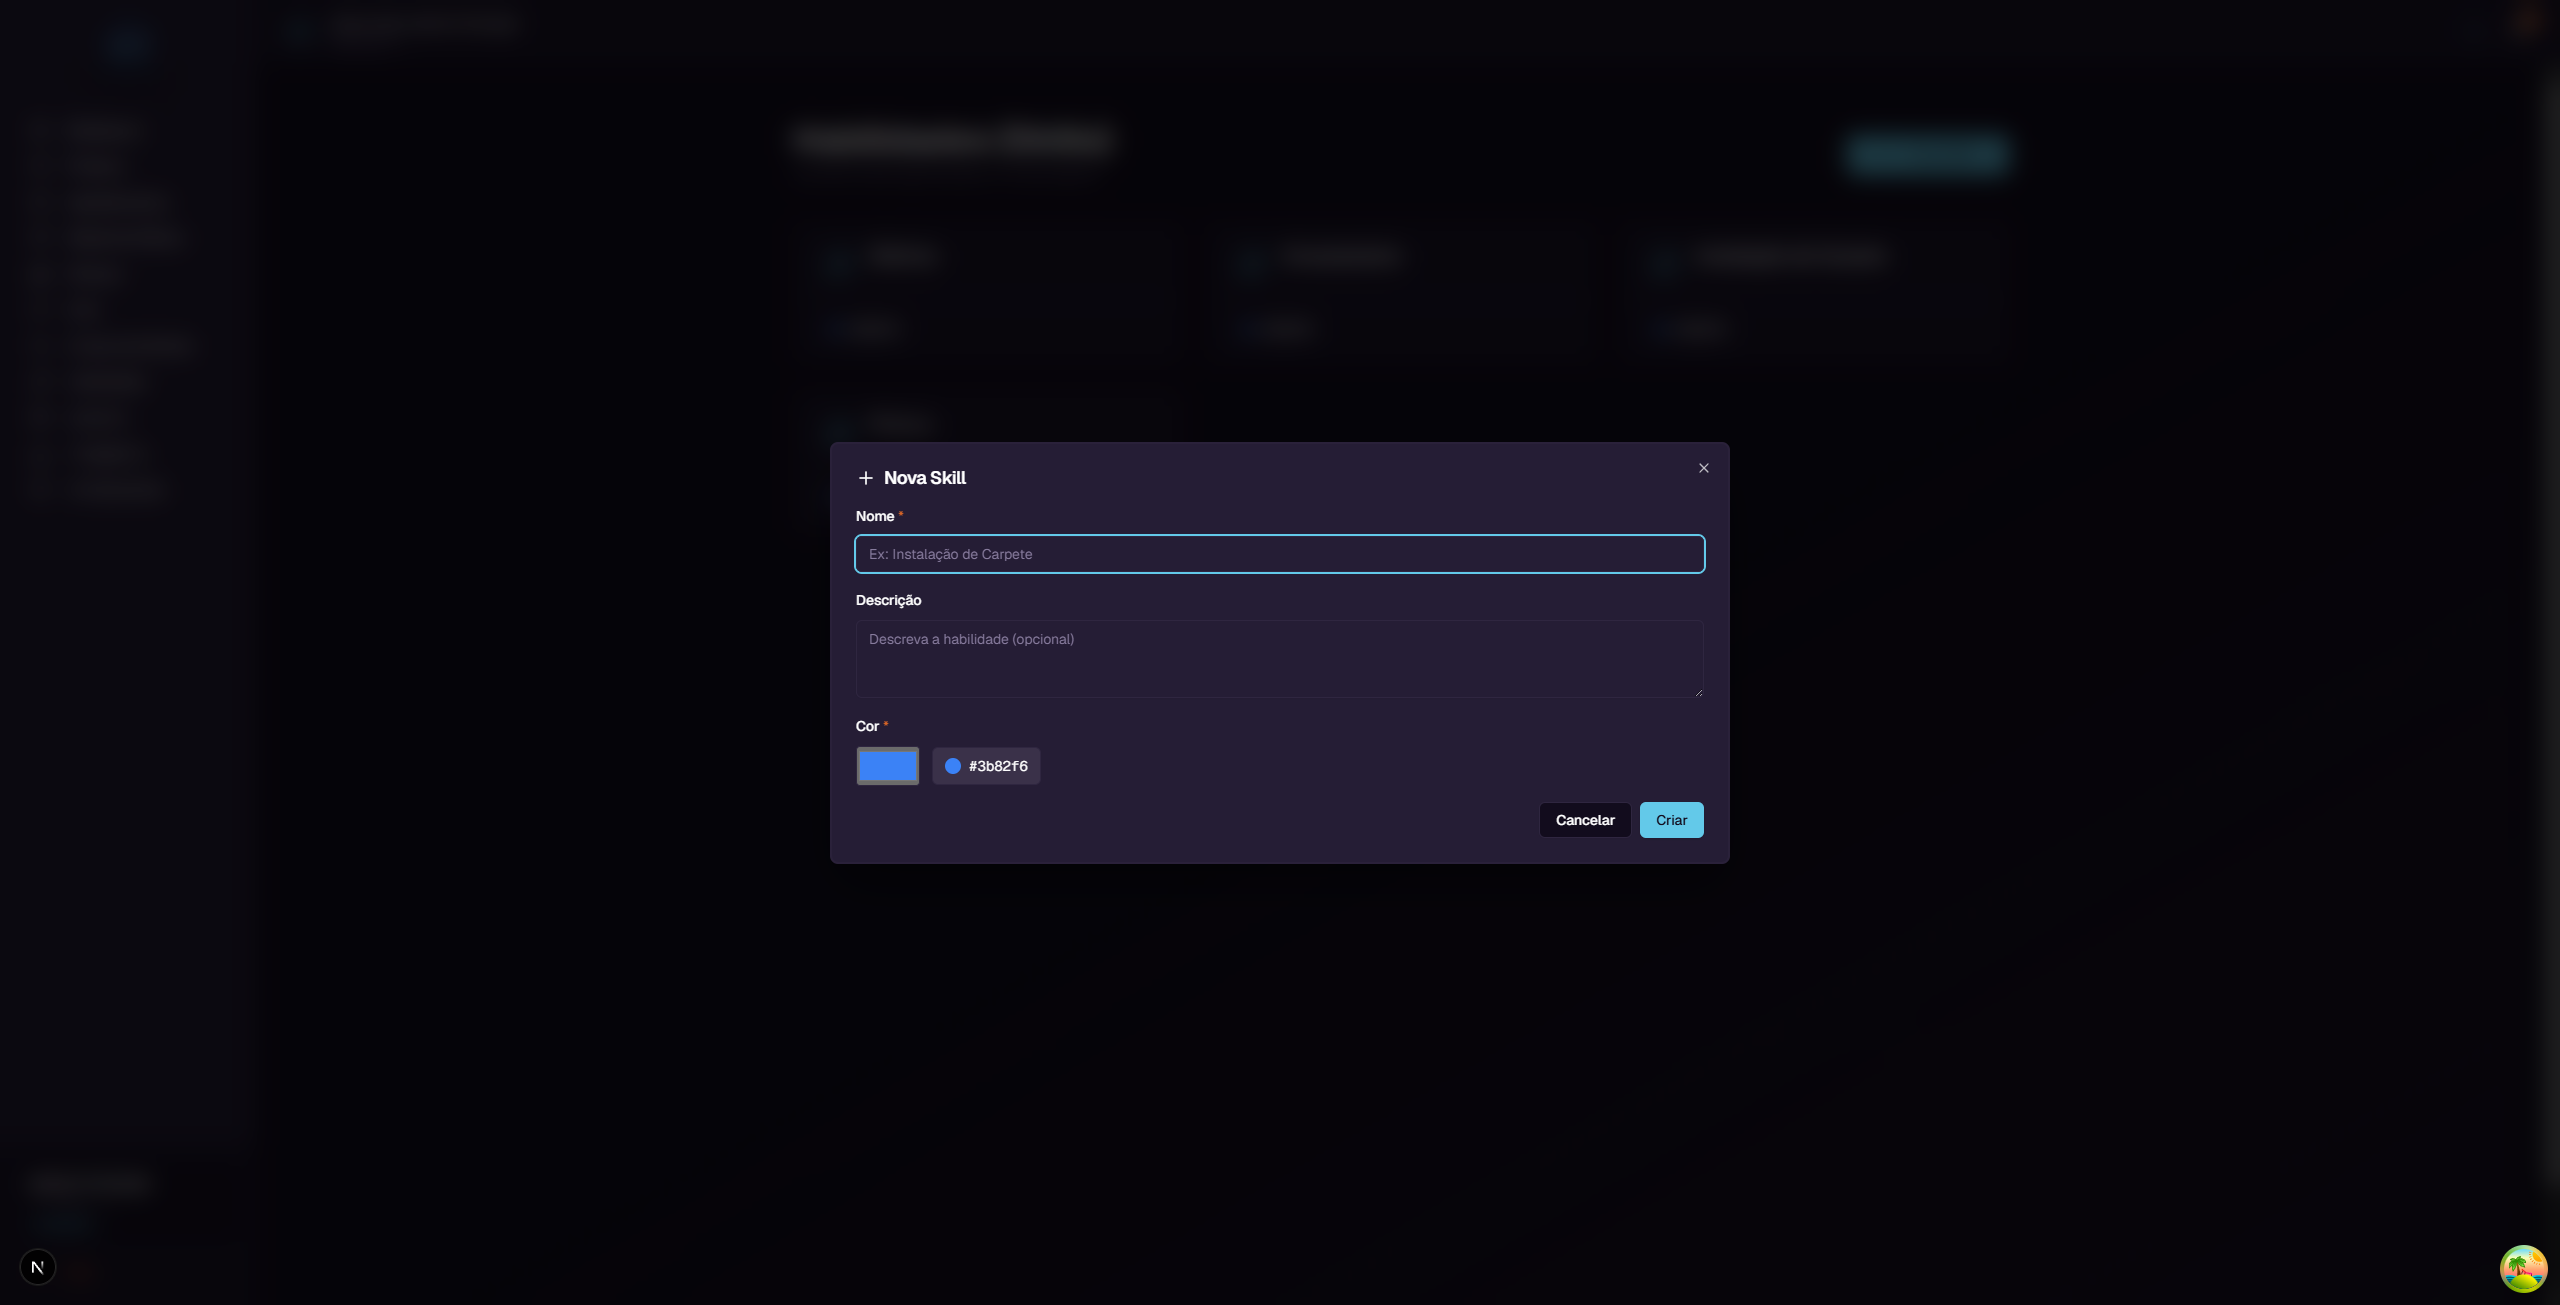
| Field | Required? | Description |
|---|---|---|
| Nome (Name) | Yes | Skill name. E.g.: "Instalacao de Carpete" (Carpet Installation) |
| Descricao (Description) | No | Skill description (optional) |
| Cor (Color) | Yes | Skill badge color (color picker, default: blue #3b82f6) |
Fill in the fields and click "Criar" (Create).
Editing a skill
Click the edit button (pencil icon) on the skill card. The dialog will open with pre-filled fields. Change what is needed and click "Salvar" (Save).
Deleting a skill
Click the delete button (trash icon) on the skill card.
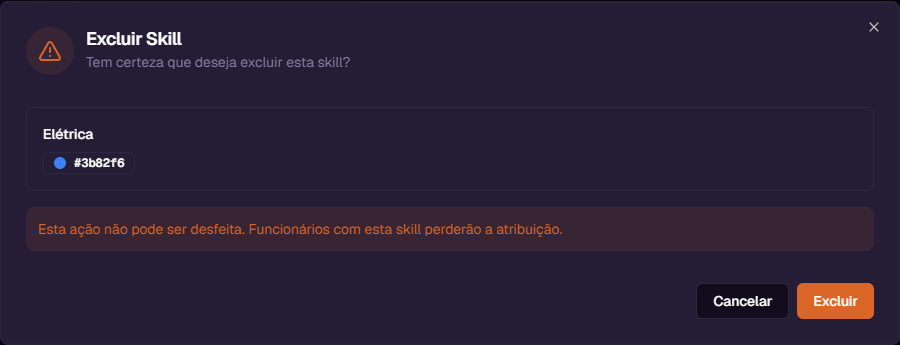
A confirmation window will appear showing: - Skill name and color - Warning: "Esta acao nao pode ser desfeita. Funcionarios com esta skill perderao a atribuicao." (This action cannot be undone. Employees with this skill will lose the assignment.)
If you are sure, click "Excluir" (Delete). Otherwise, click "Cancelar" (Cancel).
Important: When you delete a skill, all employees who had that skill lose the assignment automatically.
How to assign skills to an employee
Skills are assigned when editing a user:
- Go to the Users screen
- Click on the employee's card
- Click "Editar" (Edit)
- In the "Basico" (Basic) tab, use the "Habilidades" (Skills) field to select skills
- You can add multiple skills and remove them by clicking the "x" on each badge
- Click "Salvar Alteracoes" (Save Changes)
11. User statistics
The "Estatisticas" (Statistics) tab in the user panel shows numbers about their participation in the system.
Projects
| Indicator | What it means |
|---|---|
| Total | Total number of projects the user participates in |
| Ativos (Active) | Projects that are in progress |
| Concluidos (Completed) | Projects that have been finished |
Costs Added
| Indicator | What it means |
|---|---|
| Total | Total number of costs the user has recorded |
| Pendentes (Pending) | Costs that still await approval from an administrator |
| Aprovados (Approved) | Costs that have been approved |
These numbers help track the productivity and participation of each team member.
Quick reference
| You want to... | Do this... |
|---|---|
| See all users | Click "Usuarios" in the sidebar menu |
| Search for a user | Type in the "Pesquisar" field |
| Invite new user | Click "Convidar Usuario" |
| View user details | Click on the user card |
| Edit user data | Details > "Editar" button |
| Change permissions | Edit > "Permissoes" tab |
| Deactivate a user | Edit > "Status & Funcao" tab > Status: Inativo |
| Assign skills | Edit > "Basico" tab > "Habilidades" field |
| Filter by role | Click "Filtros" > select the role |
| View statistics | Details > "Estatisticas" tab |
| Manage skills | Click "Habilidades" in the sidebar menu |
| Create new skill | Skills screen > "Nova Skill" |
| Delete a skill | Skills screen > trash icon on the card |